 Video
Video
Working Safely in your Class II, Type A2 Biosafety Cabinet
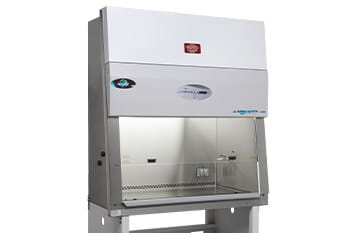
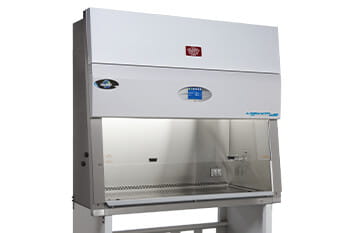
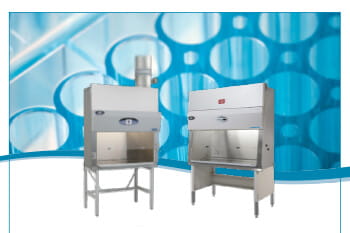
Understanding Class II, Type A2 Biosafety Cabinets
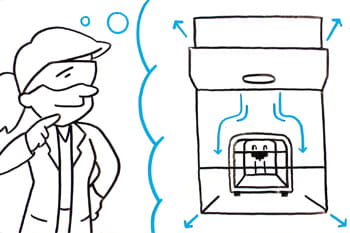
Class II, Type A2 BSCs are engineered to provide three-fold protection: safeguarding personnel from biohazard exposure, preventing contamination of research materials, and protecting the external environment. These cabinets operate by combining inward airflow at the front access opening, HEPA-filtered vertical downflow within the workspace, and HEPA-filtered exhaust air, either recirculated or ducted externally. This advanced airflow management makes Type A2 cabinets versatile for handling non-volatile biological agents and low concentrations of volatile toxic chemicals if connected to an external exhaust system.
The video begins with an explanation of the importance of selecting the right cabinet for specific laboratory needs, emphasizing the capabilities of Type A2 BSCs for biosafety levels 1 through 3. Guidelines recommend using these cabinets for microbiological studies, cell cultures, and other sensitive laboratory applications where contamination control is critical.
Preparation: Setting Up Your Biosafety Cabinet
Before starting work, careful planning and setup are crucial to prevent contamination and ensure user safety. The video outlines several critical steps:
-
Optimal Placement of the BSC:
- Position the cabinet away from high-traffic areas and airstreams, such as those created by doorways, HVAC vents, or other airflow equipment. Proper placement minimizes turbulence and maintains the cabinet’s protective airflow integrity.
- Maintain at least 12 inches of clearance above the exhaust and ensure unobstructed airflow around the cabinet.
-
Certification and Inspection:
- Verify that the cabinet has been field-certified within the last year or after relocation, maintenance, or HEPA filter replacement. Field certification must be conducted by trained and accredited technicians following NSF/ANSI 49 standards.
- Perform a visual inspection to confirm the cabinet is free from visible damage or obstructions.
-
Pre-Operation Checklist:
- Ensure all personnel are trained in the cabinet’s operation and understand its limitations.
- Verify that all alarms and airflow monitoring systems are functional. Perform a “paper test” to confirm proper airflow at the cabinet’s face opening.
-
Personal Protective Equipment (PPE):
- Wear a properly fitted laboratory coat, gloves, and, if required, safety goggles. Avoid loose clothing or jewelry that may disrupt airflow or pose a contamination risk.
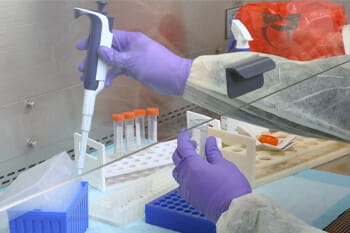
Operating the Biosafety Cabinet: Best Practices
Once the cabinet is set up and ready for use, following a precise operational sequence ensures consistent protection and contamination control:
-
Loading the Cabinet:
- Arrange items methodically to minimize hand and arm movements. Place frequently used items at the back of the work area and hazardous materials near the center.
- Avoid overloading the cabinet, as excessive equipment or supplies can disrupt airflow patterns and reduce efficiency.
-
Air Purging:
Operate the cabinet’s internal airflow system for at least five minutes before starting work. This air-purging step helps clear contaminants and stabilize airflow.
-
Proper Work Techniques:
- Perform all operations at least four inches inside the work area to maintain the cabinet’s protective barrier.
- Avoid rapid arm movements or abrupt motions that may disrupt airflow patterns.
- Do not block the front grill or rear exhaust slots with equipment, hands, or materials.
-
Glove Hygiene and Waste Management:
- Change gloves frequently and ensure that contaminated gloves or other PPE are disposed of in appropriate biohazard containers within the work zone.
- Use decontamination techniques such as surface wiping with 70% ethanol for non-disposable items before removing them from the cabinet.
-
Spill Management:
Immediately contain and disinfect spills using absorbent material and a suitable chemical disinfectant. Follow laboratory protocols for biohazardous waste disposal.
Ergonomics and User Comfort
Ergonomics play a critical role in long-term user safety and productivity. The video provides helpful tips to enhance comfort while maintaining optimal positioning:
-
Seating Position:
- Adjust the chair height so that the user’s forearms are level with the bottom edge of the cabinet window, and feet rest flat on the floor or on a footrest.
- Maintain a straight spine to reduce back strain during extended work sessions.
-
Arm Placement:
Keep arms horizontal and avoid resting them on the cabinet’s grill. Align movements with the edge of the work surface to prevent airflow disruption.
-
Visibility:
Position lighting to minimize glare and ensure clear visibility of the work area. Adjust the cabinet’s sash to an appropriate height for optimal eye-level access.
Maintenance and Certification
Routine maintenance and timely certification are vital to the cabinet’s performance and user safety. The video highlights the following maintenance activities:
-
HEPA Filter Monitoring:
HEPA filters require regular checks for clogging or reduced airflow. Ensure filters are replaced when indicated by airflow alarms or certification reports.
-
Cleaning and Decontamination:
Clean all interior surfaces before and after each use with an appropriate disinfectant, followed by a rinse with sterile water to remove residues. Pay special attention to hard-to-reach areas such as the grill and sidewalls.
-
Annual Certification:
Schedule field certification annually or whenever the cabinet undergoes significant changes, including relocation or component replacement.
-
Alarm Systems and Diagnostics:
Test airflow alarms, pressure sensors, and other safety features during routine checks to ensure they function correctly.
Troubleshooting and Emergency Procedures
The video provides detailed guidance on addressing common cabinet issues and responding to emergencies:
-
Airflow Alarms:
If the airflow alarm activates, pause all work and check for blockages or improper sash positioning. Do not resume operations until the issue is resolved.
-
Power Outages:
In the event of a power outage, secure all materials and close the sash immediately. Restart the cabinet’s airflow system once power is restored and purge the air before resuming work.
-
Chemical or Biohazard Exposure:
Follow laboratory protocols for exposure management, including immediate decontamination of affected personnel and reporting the incident to supervisors.
Promoting a Culture of Biosafety
Beyond the operational steps, fostering a culture of biosafety within the laboratory is critical. This includes:
- Regular Training and Updates
- Collaboration with Experts
- Documentation and Record-Keeping
- Continuous Improvement
Conclusion
The video “Working Safely in Your Class II, Type A2 Biosafety Cabinet” serves as an invaluable resource for laboratory personnel, providing step-by-step instructions on achieving a safe and productive workspace. By following these best practices, laboratories can ensure that their biosafety cabinets perform effectively, safeguarding both researchers and their work.
Whether you’re a new user or an experienced technician, incorporating these insights into your daily operations will enhance biosafety compliance and foster a culture of safety and responsibility in your laboratory.
Please accept marketing cookies to view this video.
Related Resources
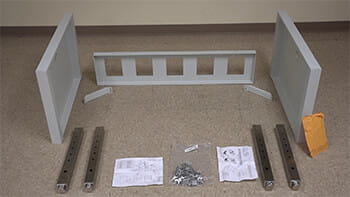
Telescoping Base Stand Assembly for Your Class II Biosafety Cabinet
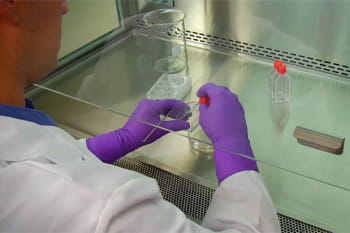
Surface Decontamination in a Biosafety Cabinet
Smoke Tests NSF/ANSI 49

Therapeutics to Combat Aggressive Cancer
Understanding the Biosafety Cabinet
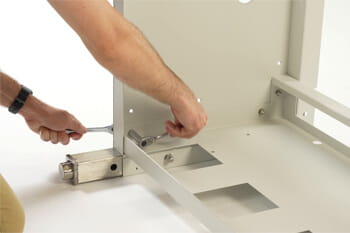
Telescoping Base Stand Assembly
Tailor Made Biosafety Cabinets for Automation
Tips for Purchasing a Biosafety Cabinet
Setting Up the Lab
When to Replace Your Laboratory Centrifuge
Standard Operating Procedures (SOPs) for Biosafety Cabinet Use