Article
Setting up the Class II Biosafety Cabinet Work Zone for the Biomedical/Microbiological Work
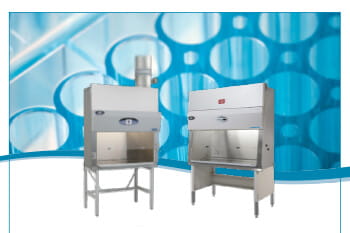
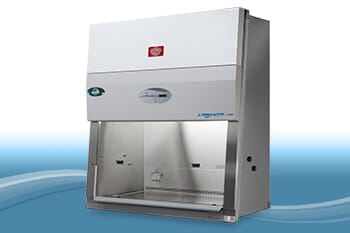
Biosafety Cabinets (BSC) are essential pieces of equipment in any laboratory working with biohazardous materials. They range from Class I cabinets designed to protect both personnel and the environment from low-risk particulate matter and aerosols to Class III cabinets for working with agents requiring maximum containment and protection. The Class II Biosafety Cabinet is the most commonly used primary engineering control device in the tissue culture laboratory. A Class II BSC is available in various types (A1, A2, B1, B2, and C1) that perform similar functions but vary in the dedicated portion of exhaust air. A Biosafety Officer, Principal Investigator, Lab Manager, and other stakeholders can determine the appropriate Class and Type of airflow device needed for their lab through a proper risk assessment. This article discusses the basic concepts for setting up your Class II BSC work zone before operation begins. As always, please follow your laboratory Standard Operating Procedures (SOP) or discuss Good Laboratory Technique with your Environmental Health and Safety (EHS) department to develop appropriate SOP’s for your studies.
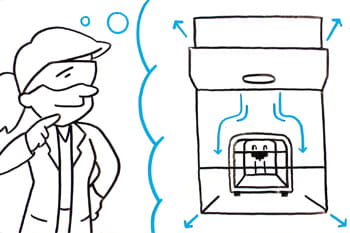
A Class II Biosafety Cabinet relies on a continuous flow of air into the enclosure and away from the end-user; this is HEPA filtered before being expelled or recirculated from the system. As such, their effectiveness hinges on several best practices. These include:
-
Working at the proper sash level to ensure correct airflow during cabinet use.
-
Avoid placing items on the work zone’s front and rear grilles that could result in unwanted air exchange between the cabinet and the laboratory.
-
Minimize arm movements that might compromise the air curtain.
-
Follow good aseptic techniques to reduce the generation of aerosols.
In addition to these measures, it is critically important that the biosafety cabinet work zone is set up appropriately. Decontaminate interior work zone surfaces and load the biosafety cabinet with materials before work begins. Position instruments and consumables to encourage working from clean to dirty. Confine manual operations to the middle third of the work surface so that operatives are not required to reach across the biosafety cabinet and risk knocking items over.
Below, we suggest tips for preparing your biosafety cabinet work zone and note several commonly implemented strategies to help keep you and your samples safe from cross-contamination.
Decontaminate the BSC before use
It is vital that you first decontaminate the work surface and interior walls with a suitable disinfectant before beginning your workflow. If an ultraviolet (UV) light is present and turned on, please turn it off before use and raise the window sash to the operational level. The most commonly used disinfectant is a 70% ethanol blend with an anti-static wipe that reduces lint and electrostatic discharge. As it relates to alcohol, Annex I-1 of NSF/ANSI 49-2019 states 70% alcohol is not considered an appropriate disinfectant because it does not affect fungal spores. The use of bleach to sterilize the cabinet may damage the stainless steel. NuAire does not recommend using chlorinated or halogen materials and will nullify any active warranty if used. If your facility SOPs recommends using bleach inside a BSC, it is essential to rinse immediately with a disinfectant and sterile water to dilute and remove chlorinated material.
The BSC should be left running so that the atmosphere within the work zone is fully purged. Only use arms and tools to clean the interior of the cabinet. Please do not allow users to place their head within the BSC to reach far the cabinet’s interior corners. Cleaning wands are available to clean unreachable corners of the interior work zone.
Load the BSC sensibly
After decontaminating the work zone, load the biosafety cabinet with all necessary equipment to perform your experiment – taking care not to overfill the work zone. Overfilling the work zone will interrupt the airflow, putting you and your samples at risk. Items such as vortex mixers, plate shakers, pipettes, tip boxes, and waste collection containers should also be surface decontaminated with an appropriate disinfectant before being placed in the enclosure. They must always be allowed to dry completely for the disinfectant treatment to take effect.
It is important to note that while having all the required equipment in place prevents unnecessary disruption to the airflow once experimental work is underway, loading the biosafety cabinet involves far more than merely placing everything inside it. Instead, items should be positioned at least four inches from the front of the cabinet and as close to the back of the enclosure as possible without blocking the rear grille, especially where those items have the potential to generate aerosols. Bulkier items such as biohazard bags should be placed toward the sides of the enclosure. It is often sensible to line the work surface with disinfectant-soaked absorbent towels to capture any liquid splashes.
Tip: Keep a spill kit close by in the event of a spill or a glass break.
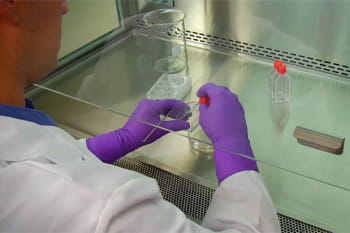
Leave room to maneuver
Any work requiring the use of a biosafety cabinet will inevitably necessitate some degree of physical manipulation. Whether that be plating cultured cells, homogenizing tissue samples, or separating peripheral blood mononuclear cells (PBMCs) from whole blood, you should always leave yourself plenty of room to avoid causing a spill or suffering a repetitive strain injury (RSI). This is best achieved by confining manual operations to the middle third of the work surface, reserving the surrounding area for placement of instrumentation and consumables. As well as preventing the airflow from being compromised by operatives repeatedly leaning on or over the front grill, this also promotes good posture.
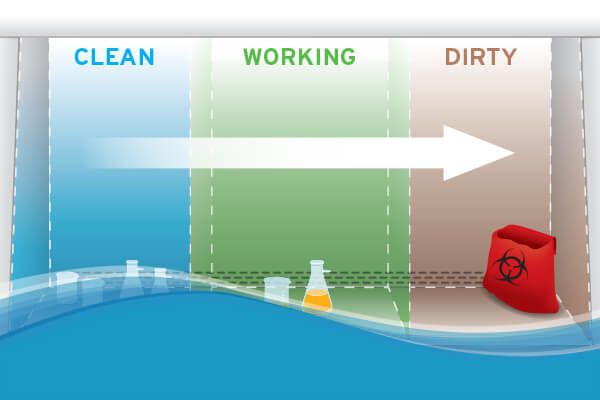
Work from clean to dirty

Most experimental procedures follow a defined protocol comprising several distinct steps; those steps will occur within a biosafety cabinet. Configure the work zone from left to right (vice versa if the operative is left-handed) to encourage samples’ movement across the enclosure from clean to dirty as the workflow progresses. Under NSF and BMBL, materials should be space 12-inches (305 mm) apart, careful that contaminated items do not pass over clean items.
For a right-handed user, this work zone should be configured to have the samples (stored on ice) positioned on the left of the biosafety cabinet, followed by the vortex mixer and then a reservoir containing the sample diluent. Next would be the plate shaker and a biohazard bag for discarded tips. A suction collection flask for well aspiration would typically be placed beneath the biosafety cabinet, connected via tubing to a hand-held aspirator intended for use within the enclosure. This setup limits the risk of cross-contamination by eliminating the need to move samples over one another and maintain airflow integrity by streamlining sequential movements. Some sources emphasize the importance of putting the “biohazard collection bag” or the dish for “pipette collection” inside the work zone so one can fill them inside the cabinet instead of breaking the front airflow to reach these receptacles externally.
Conclusion
Working at a BSC takes dedication, training, and clearly defined SOP’s to maintain the safety of any technician working within the lab. Follow these basic principles by setting up standard operating procedures during your risk assessment. With proper planning and some practice, safely working at a Biosafety Cabinet will quickly become second-nature.
Sources:
- NSF International. NSF/ANSI 49-2019. Biosafety Cabinetry: Design, Construction, Performance, and Field Certification. Informative Annex 1. 2020.
https://d2evkimvhatqav.cloudfront.net/documents/nsf_49__annex_I-1.pdf - Centers for Disease Control and Prevention. Biosafety in Microbiological and Biomedical Laboratories (BMBL) 5th edition. Appendix A. Atlanta, GA: CDC, 2009. <https://www.cdc.gov/labs/pdf/CDC-BiosafetyMicrobiologicalBiomedicalLaboratories-2009-P.PDF>
- World Health Organization. Laboratory Biosafety Manual 3rd edition. Chapter 10. Geneva: WHO, 2004. < https://www.who.int/csr/resources/publications/biosafety/Biosafety7.pdf?ua=1>
Related Resources
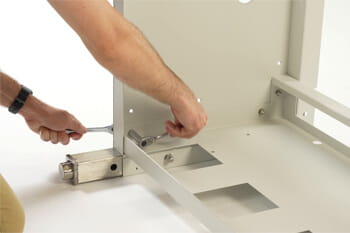
Telescoping Base Stand Assembly
Tailor Made Biosafety Cabinets for Automation

Standard Operating Procedures (SOPs) for Biosafety Cabinet Use
Tips for Purchasing a Biosafety Cabinet
Understanding the NSF/ANSI 49 Standard: Ensuring Safety and Efficiency in Biosafety Cabinets

10 Steps to Cleaning a Spill in a Biosafety Cabinet
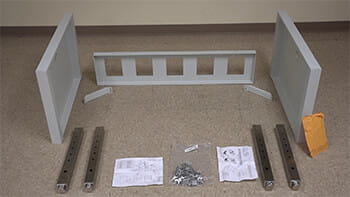
Telescoping Base Stand Assembly for Your Class II Biosafety Cabinet
Understanding the Biosafety Cabinet

Smoke Tests NSF/ANSI 49

When to Replace Your Laboratory Centrifuge

Surface Decontamination in a Biosafety Cabinet